Showing posts with label Ashtyn. Show all posts

Tuesday, May 8, 2012

Daisy and Her Babies

I FINALLY got the rest of the Tab "Daisy and her Babies" a little updated! So here you go! :)
This summer on 8.8.11 Daisy had her 1st litter of pups 11 of them (unplanned by us). So it was a big suprise, we did lots of research and being a stay at home mommy and wanting to teach the kids some major responsablity we took extereme care of the pups. I kept track of their growth and what we did with them daily, lots of blogging..along with taking HUNDRES of pictures! To view their development click HERE!
I also finally uploaded a little video we got of the puppy birth! :)
Click HERE to watch it! :)
They were such a joy to all of us. We had so much fun caring for and raising these pups!
We are very happy to report that ALL the puppys went to wonderful homes, most in MN but 1 puppy (Ashtyn's favorite who she called 'Princess') went all the way to Washington!
There are a few puppys that are living locally, it is so much fun for us to be able to go see them.
We would LOVE any pictures or updates of the pups from Daisy's 1st litter if you have them :)
You can email them to Heather
Ashtyn with Momma Daisy and 10 of her pups, this picture was taken
just MINUTES before she had her last pup with Ashtyn sitting right next to her!

Thursday, April 26, 2012

Ashtyn, doing what she loves, Barrel Racing!

The kids and I were watching old videos and I came across this one from last summer. 
Ashtyn (5 years old) barrel racing her horse Punky. He was run in barrels in the PRCA rodeo until he was 6.
I am so proud of my baby girl! Her determination amazes me and he strength and courage just fill me with so much  joy!
Here is a video of her barrel racing at local horse show :)


Photobucket

Tuesday, January 17, 2012

Making some Daisies

Ashtyn had the day off of school for "In Service". I just treasure my time with her. So she got to pick our agenda for the day, with a little help from her brother of course! After we finished breakfast we all headed right upstairs to make some flowers! She wanted to make a bunch for her friends that are coming to her birthday party (she turns 6 on Friday, where has the time gone)!
We made lots and lots of flowers. I just cherish those moments, we sing and talk and giggle away the entire time. The boys also had a fun time using our table as their machine shed and they parked their John Deere Tractors underneath and played their usual.. farmin and cowboys!
I'm so thankful for this little business that we have started and feel so incredibly blessed to be able to stay at home with all 3 of my children each day!


Ashtyn and her favorite flower that she created :)

Ashtyn's little flower display of her favorites that she made from the day :)
Photobucket

Tuesday, December 20, 2011

Crayon Letter Wall Hanging

This year for Christmas Ashtyn really wanted to make her own gift for her teacher, Mrs. Johnson. We saw this idea and she LOVED it! So we decided to give it a try! Here's what we did.

Material Needed:
Frame (without the glass)
Spray Paint (if wanted- we spray painted the frame and the matting to match)
Crayons
Glue Gun & Glue Sticks

What To Do:
1. Spray paint your frame
2. Align the crayons the way you would like them (it helps to lay them out first to make sure you have enough room)
3. Use your hot glue gun to glue each crayon individually (you don't need a lot of glue but make sure to glue each crayon)

And wallah! You're done, so incredibly easy and I had everything on had to make it :)
Enjoy!

The finished Project! A "J" for Ashtyn's teacher :)

Friday, December 2, 2011

Decorative Tiles

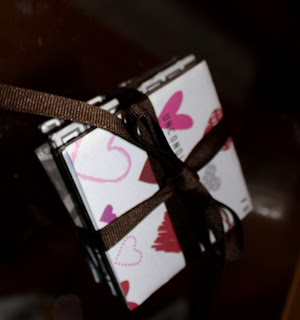
The kids and I really enjoy making these decorative tiles, they can be used for coasters
or you can hang them on the wall or use a clothes pin and some wood glue and they can be set up anywhere!
They are so cute, easy and very affordable to make!
Ashtyn and I made a few sets for gifts this year, here's what we did!

Supplies:
Tiles (We got ours from Menard's, you can buy them from any hardware/home store)
Scrapbook Paper
Paper Cutter (Rotary Cutter, scissors)
Ruler
Mod Podge
Paint Brush
*Gems/Ribbon, ect. Ashtyn likes to decorate hers a little more than just the paper :)

WHAT TO DO:
1. Cut out your scrapbook paper to fit the tiles
2. Put a THIN layer of Mod Podge on the tile
(note-- make sure to not use to much or your paper will bubble)
3. Place the scrapbook paper onto the tile rub it until smooth
4. Place a layer of Mod Podge over the entire title.
5. Let dry (if wanted you can decorate with gems/ribbons/ect.
6. Repeat with another layer of Mod Podge
7. Let dry for 30 min.

A few of Ashtyn's finished tiles

Titles that we bought from Menard's

I have found using a roatary cutter and large ruler is the quickest and easist way to do this!

Paint on the mod podge then add your paper, then paint another layer of mod podge!

Press down the paper, get out all those bubbles!


Woala! Finished products! GREAT GIFTS :)